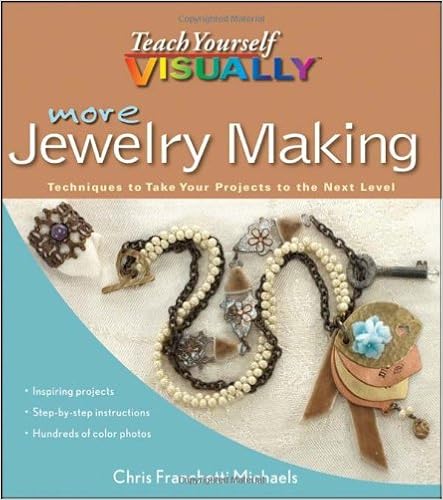

By Chris Franchetti Michaels
The visible technique to get addicted to jewellery making
Unlike different crafts that target a reasonably slender variety of strategies and fabrics, jewellery making is especially huge; the options surround every thing from bead stringing to steel stamping to operating with sorts of clay. More train your self VISUALLY jewellery Making selections up the place Teach your self VISUALLY jewellery Making & Beading leaves off and provides you much more suggestions to create new different types of jewelry.
Beginning with a concise review of jewellery making instruments and crucial suggestions, the booklet delivers technique-specific chapters overlaying: simple steel paintings, steel chilly connections, sculpting with steel clay, embellishing steel, designing with chain, utilizing adhesives, and dealing with paintings glaze, resin, and leather-based. Plus, a last bankruptcy dedicated to instance initiatives delivers guideline for making 12 detailed items so as to add in your jewellery collection.
- Step-by-step directions are followed by way of transparent, particular photographs
- Features a set of attractive styles utilizing the strategies described
- Online bonus beneficial properties comprise a loose bonus venture and downloadable paintings and patterns
- Other titles through Chris Franchetti Michaels: Teach your self VISUALLY jewellery Making & Beading, train your self VISUALLY Beadwork, Beading visible fast Tips, and Wire jewellery visible fast Tips
If you are a starting to intermediate jewellery maker trying to upload up to the moment recommendations in your repertoire, More educate your self VISUALLY jewellery Making has you coated.
Quick preview of More Teach Yourself VISUALLY Jewelry Making: Techniques to Take Your Projects to the Next Level PDF
Similar Crafts books

A Hot Glue Gun Mess: Funny Stories, Pretty DIY Projects
During this appealing paperback version that includes French flaps, highly well known way of life blogger, YouTube superstar, and fashion designer Mr. Kate (Kate Albrecht) bargains a beautiful choice of step by step own sort and residential projects—woven in with quirkily hilarious tales and anecdotes. Do you dream of discovering how you can infuse home made tasks into each element of your lifestyles and feature enjoyable doing it?
Build Your Own Quadcopter: Power Up Your Designs with the Parallax Elev-8
Construct a customized multirotor plane! construct and customise radio-controlled quadcopters that take off, land, hover, and leap. construct your individual Quadcopter: energy Up Your Designs with the Parallax Elev-8 beneficial properties step by step meeting plans and experiments that might have you ever launching absolutely functioning quadcopters very quickly.
The Basics of Corset Building: A Handbook for Beginners
Contemplate a corset as a clean canvas. Linda Sparks' the fundamentals of Corset construction: A instruction manual for rookies is a finished consultant to development your first corset, including:Section One: instruments and fabrics for Corset BuildingDiscusses the instruments you will want, plus forms of metal, plastic, and textiles.
The Sewing Book: An Encyclopedic Resource of Step-by-Step Techniques
This can be the one stitching booklet you are going to ever desire. each software and each process you require for making your house furniture or garments is heavily and sharply photographed, conscientiously annotated, and obviously defined. The instruments part starts off with the fundamental toolkit, establishing up into every little thing you may want - all types of slicing device and computer foot is proven.
- The Complete Guide to Sharpening
- The Knitting Answer Book: Solutions to Every Problem You’ll Ever Face; Answers to Every Question You’ll Ever Ask (2nd Edition)
- Airbrushing for Railway Modellers
- Cushions & Quilts: 20 Projects to Stitch, Quilt & Sew
- Toddler-Size Crochet: Complete Instructions for 8 Projects
- Stitch Encyclopedia: Knitting: An Illustrated Guide to the Essential Knitting Stitches
Additional resources for More Teach Yourself VISUALLY Jewelry Making: Techniques to Take Your Projects to the Next Level
112 Join parts with Rivets R ivets are brief lengths of cord or steel tubing that paintings like nails to carry jewellery elements jointly. in addition they can function in basic terms ornamental parts on sheet steel and steel blanks. you should purchase readymade rivets from jewellery making providers or cause them to your self. As a basic rule, use readymade rivets with posts which are approximately 1 ⁄16 inch longer than the mixed thickness of the parts being joined. set up Readymade strong Rivets stable rivets are made of twine, instead of from steel tubing. 1 Lay out your layout through stacking and pre-positioning the parts that you really want to affix jointly. 2 Use a marker to put a dot at the most sensible part within the locations you must set up rivets. three Optionally, use a marker to mark the destinations of the sides of the head part at the backside part. four get rid of the pinnacle part and pierce one of many marked dots (see the part “Pierce steel” in bankruptcy four) to create the scale gap suggested on your readymade rivets. The rivets within the instance use 1. 6mm holes. five Reposition the pinnacle part at the backside part, and use an excellent tip marker to mark the ground part in the course of the gap. ninety eight four five Joining with chilly Connections bankruptcy 6 6 get rid of the ground part and pierce it during the dot with a similar dimension gap. 7 position the rivet, head down, on a bench block and stack at the pierced parts. (The rivet head should still face front of the layout. ) 6 7 eight nine eight decide up the rivet and parts and, if useful, use aspect cutters to trim the rivet finish in order that it extends 1⁄16 inch from the part. (Always put on protection glasses in case you trim rivets, and target the rivet finish clear of you if you make the reduce. ) nine somewhat flatten the rivet finish utilizing a medium-grit sanding stick or a delicate (fine) lower steel dossier. zero position the elements in your bench block with the rivet head dealing with down. ! Use the ball finish of a small ball peen hammer (see bankruptcy 1) to faucet calmly round the fringe of the rivet finish, progressively flaring the steel outward. @ payment to determine even if the rivet is safe. If no longer, hammer a little extra after which cost back. eleven ninety nine Join elements with Rivets (continued) # Use the flat part of the hammer to calmly faucet immediately down at the new rivet head to flatten it. $ to put in a moment rivet, pierce either parts via a moment marked dot. For heavier gauges or a number of layers of parts, you'll have to use an influence drill (see the part “Pierce steel” in bankruptcy 4). you have to continuously whole at the very least rivets to stabilize your piece ahead of piercing the remainder marked holes. 14 percent Pierce the holes for any final rivets, and practice Steps 7–13 to put in them. ^ Optionally, end via sanding with medium-grit sandpaper to gentle out the surfaces of the rivet heads. entrance Use Washers to Rivet tender fabrics TIP you may also use rivets on non-metal fabrics, corresponding to plastic, textile, paper, and leather-based. to maintain the rivets from pulling via or destructive delicate fabrics, use them with washers.